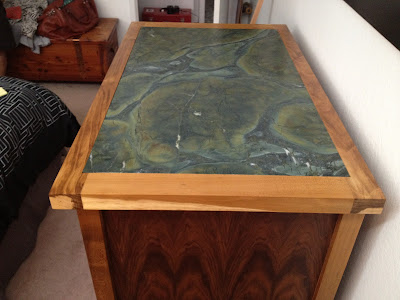
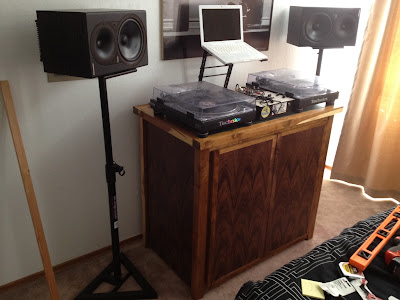
the next day we were rested, caffeinated, and ready to finish this thing up. this entry is by far the most pictures, with lots of shots showing off how beautiful this piece has come together. the finish is fantastic, and the two woods work so well together along with the granite top.
we got right to it, hanging shelves was step number one. these strips of wood are screwed into the side of the ply walls.
hanging shelves is no easy feat, i wanted to have specific measurements between shelves. dad got caught picking his ear while i fiddled around with ideas of how to make sure that the shelves were level and to the right dimensions.
here's the bottom shelf hung. this shelf sits pretty flush with the bottom horizontal brace, just as i expected. i love the look of the lightly colored sapwood.
notice the hole in the shelf used for threading wires to the back. i always appreciate a good wiring job.
the second shelf is dropped in. thanks mom for taking a few pics while we worked.
the third shelf hung. the distance between shelves turned out not to be exactly what i wanted, but will work well anyhow. again, woodworking is improvising, so we had to improvise on exact design distances.
securing the top to the base was rather simple since we had all mounting points drilled and attached. we set the top on the base, drilled a few pilot holes, and screwed it in.
the granite fits like a glove! before we put the granite on, i weighed it with my bathroom scale. 65 lbs! i also weighed a single shelf, which clocked 15 lbs. then we roughly calculated that the entire credenza is about 200 lbs!!!!
and lastly, we put the doors back on. the hinges allow the doors to be easily removed and attached so this step took seconds. the hinges are also soft close, so there's no slamming of doors happening.
this is one solid piece of furniture. as we were putting this together dad was telling me that it would function as a bar pretty darn well. modifying the middle shelf to pull out even is an option down the road. who knows?! the only things i do know are that this is one heavy piece, and i'll be owning it for a long time.
the last step was to setup all of my dj gear. finally i get a look and feel of my ttt (turntable table).
i couldn't be happer with my credenza project. just look at how beautiful the wood is when the sun hits it.
i used a nifty iphone app to take this panoramic picture, showing the room and how the credenza fits in its current space.
i had a fantastic time from start to finish with this project. i can't thank my parents enough. dad and i spent hours talking, working, sweating, and having the time of our lives. mom put up with us talking about it to no end, finished every single piece, and helped with the odds and ends that dad and i needed (like dropping off the granite to get cut). and of course, they both took a short vacation to drive it over 500 miles so that i could have it in my home.
the credenza has a very high value for all of these reasons, but the time spent with my parents during this project is priceless and irreplaceable.


2 comments:
Hooray!!! Looks fantastic! Now you're ready to take requests, right? We need a new dining table... :)
I am riya sharma, I am also a web designer and I like your blog too much the colors and themes are really nice.
Woodworking Projects and Plans are much sought after stuffs today both online and offline because woodworking has gone to a whole new level in today’s time.
People want exceptional and attractive design and also they are short of time so they need it pretty quickly and they can’t afford to waste
too much time on searching for Woodworking Plans here and there
Do visit my blog woodworking projects
Post a Comment