Wednesday, February 23, 2011

the eggling pt. 11

it's been a while since the egglings have made any blog appearances. not to worry they are doing just fine.

rondo is getting too big for his britches, and so i've given him a bit of a crutch to stand on.


ray ray is almost ready for his second harvest, about a month ago i trimmed off all of the large leaves and enjoyed some basil chicken dinner.


soon these guys are going to have to leave the egg and move onto a bigger pot. i just don't want my babies to grow up so fast!

Tuesday, February 22, 2011

4 icons pt. 3

round three of 4 icons. hong.

hong has either worn the same i <3 ny shirt for the past 11 years, or he's buys them by the dozen. he lives in san diego.

hong ->
fishing :: i <3 ny :: pokerchips :: tennis


the poker chips probably could have been redone as cards.

Saturday, February 19, 2011

4 icons pt.2

while i decided to do the 4 icon thing for myself, i was talking to a friend online. of course he put together his own 4 icons (which i noted down).

jon ->
wifi :: chucks :: pen & paper :: toaster

Wednesday, February 16, 2011

4 icons

i'm no designer, but i know designers!

one of those designers sent me a link to this 4 icon project someone ( a neato designer) did. i loved the idea so much that i immediately brainstormed what would my 4 icons be.


these were sketched on paper, scanned, vectorized in illustrator, then put together in photoshop. probably a bit of techno overkill but hey, that'd be my 5th icon.

edit:
i didn't like how that computer looked, i felt that it was outdated so i removed the tower. i think this makes things look much better.

Friday, February 4, 2011

sofa side table

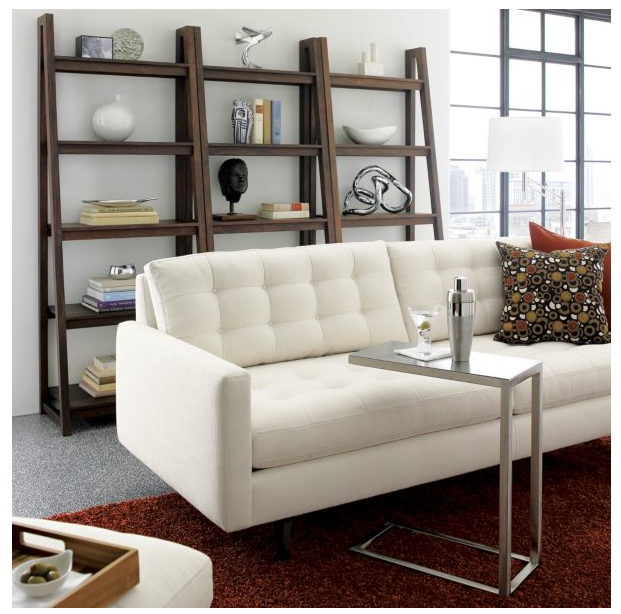
shortly after designing and buying my custom sofa i noticed a c-shaped table from crate&barrel. it's a great design. the table is just high enough to clear the arm of a sofa, and the c-shape allows the table top to be pulled over the sofa. the $350 price tag quickly deterred me picking one up. "shit, for $350 i can make one of these".

and that's what i did.

i can't take all of the credit, dad is the one who built the wood shop in his home. he also purchased all of the wood. and most importantly provided the beer. it all started with some back and forth sketches.


first step, measure out the wood. there was enough scrap wood to make three tables. two would be made from mahogany, and one from cherry. this includes the feet, legs and arms only. tops will be figured out later.


marking the wood with chalk assures we've accounted for all the pieces we need. remember to measure twice and cut once!


here are the cut pieces for all three tables. can you tell which is the cherry and which are the mahogany?


we decided to use morties and tenon joints. it's a strong yet simple joint, and when done right can be pretty nifty looking. the morties are made with a router.


the tenons are cut on the table saw with a dado blade.


loosely assembled the tables are taking shape.


non load bearing joints were connected with pocket screws


each table was glued and clamped. we used pieces of wood at right angles to assure that the legs and arms were set perpendicular (nobody wants a crooked table).


a close up of the glued joints followed by the two mahogany frames with dry glue all ready to go. time to get these topless tables some tops.


because the table was my concept, i was able to claim the cherry table as my own. and since dad had made a kitchen table with cherry (and this project was using the scrap wood from that project) he was okay with that. the piece on the right is a 1" thick piece of cherry that i wanted to use for the top. i would re-saw the piece, resulting in two 1/2" thick pieces. then those two pieces would be book-matched. dad had created the left most piece while learning to veneer. this is 4 pieces of sequentially cut walnut veneer pieces on a piece of mdf. the third table was initially going to use part of the large center piece, which was also a veneering piece my dad created earlier. we later scrapped that idea.


dad made a frame out of walnut. he then used a router to carve out a groove where the walnut veneer piece will sit. the knot will be filled in with clear epoxy come finishing time.


my re-sawn and book-matched cherry top was then glued to a piece of plywood for added strength and rigidity. the bag is attached to a vacuum that sucks the air out, applying uniform pressure for a perfect glue. the white board underneath is grooved so that no air pockets form. air pockets could infect our perfect glue job.


a solid cherry frame was glued to the edge of my cherry top. thumbs up was given.


the two table tops sitting atop their respective frames. at this point everything fits and the final dimensions are to the specs we designed for. if you're wondering about the third table, don't worry it got a top too.

the tables were sanded and finished. unfortunately i wasn't able to partake in this process i had to go back home. but i must say, mom did a fantastic job with the finish! when the table was complete they shipped it to me.


please, have a seat! chips and salsa anyone?
[notice the coaster underneath the salsa]

Thursday, February 3, 2011

eaters and tasters


everyone claims that they love to eat. i've heard almost every person i know get overly excited at some point in time about food. but do they really "love to eat"?

i've come to the conclusion that most people do not necessarily love to eat. they do however, love to taste.

what's the difference between "likes to eat" and "likes to taste"? it seems there's a fine line between the two, yet i have noticed quite a number of differences myself.

the people who like to taste can't remember the last time they ate till they were obscenely full. they love great flavors, but don't love the ritual of gobbling down food until no further eating can possibly be done. they taste the flavors and when they approach full, they stop. perhaps they stop when they're 75% full because they know that in 10-15 mins they'll feel full. i can't tell you exactly how this happens as i don't consider myself a taster, i love to eat.

which brings us to those who love to eat. these folks can be eating a plate full of many different beautiful flavors, or one heaping mound of the same pseudo bland dish. given no consequences these people will eat until exhaustion in either scenario. they like flavors and delicious delicacies just as much as those who love to taste, but above and beyond that they love to eat. they'll eat till they're 100% full, only to later realize that they are actually 120% full (usually happens 10mins later) and have to unbutton the top button of their now tight pants.

you can distinguish the two types rather easily. those who love to eat normally eat very fast, as they aren't savoring the flavor of each bite because their pleasure comes from getting food in their belly. furthermore people who love to eat will often times get frustrated at those fancy places where the entrees look very pretty, yet are hardly big enough to properly nourish a 6 year old. in fact, i'm almost positive that it was a person who loved to eat that came up with the concept of buffets and all-you-can-eat menus.

do you love to eat? or do you love to taste?

Saturday, January 22, 2011

Lamp

i've been wanting a lamp above my desk for some time. i've online shopped, and went to ikea before deciding that in order to get what i wanted i'd have to do it myself. so i headed to the thrift store to purchase what is usually the most expensive part of the lamp, the shade. $1.25 later i had this bad boy. of course, i bungee'd it to the back of my bike cause i'm green and all that jazz.


i purchased a socket with a pull chain (the rage now seems to be in-line-switches) but for what i wanted, that was not ideal. the center gold ring is the lampshade holder, and the extra pull chain with white nub was also purchased. these things cost me approx $20. not pictured is the 20 foot long extension cord, i also purchased for $14.


a little dremel action for this lampshade holder to fit perfectly.


viola lampshade will be held (the white piece is the lampshade mount.


here we are assembled.


and it's not a real job unless something breaks in the process.


better be more weary of that cord on the hook when measuring the ideal lamp height.


no humans were injured in the making of this hanging lamp.


lights on!


lights off!


i'm ready for my closeup mr camera man.

Thursday, January 13, 2011

hype

i love the hypemachine. hands down it is the one website where i can spend the most time. for most that prize goes to facebook, or some other social networking aka check out your friend's friends webpage. not me, not in 2010. this is not an ode to hypemachine or a facebook bash, this is me sharing my excitement about hypem's latest "greats of 2010".

they have created a list of the most blogged about artists, albums, and songs for 2010. but. and this is a big but. for the top 50 songs, they went one step further and had 5 different artists make 20-30 minute mixes featuring their selection of the full list of the top 50 songs of 2010. and you can download them here. currently i'm jammin' to the clock opera mix. and of course, all 5 are available for download.

believe the hype[machine]!

Monday, January 10, 2011

nye 2010

this video captures what i was doing and with whom as 2010 ended.


2010 was a good year. heck, any year i'm alive is a good year when you put it in perspective -and i sure like dancing with my friends.

Tuesday, January 4, 2011

coasters

dad got a lathe recently for his woodshop. for those who aren't woodshop saavy, a lathe spins wood. when the wood is spinning, different speeds and tools can be used to cut and shape the wood. think of table legs, or those posts that hold up the bannister on your stairs -done on a lathe.

i went one step further, and fancier for my 1st attempt. i took pieces of scrap and glued them together before heading to the lathe. yellow heart, mahogany, and oak. using one solid piece of wood would have been simpler, but i don't think the final product would have been as nice. you be the judge.


i used plenty of glue, and clamped the scraps together. then let it sit over night. i had to use plenty of clamps to assure there were no air pockets.


a day later, the clamps came off and so did the corners. you want the wood as circular as possible before it hits the lathe. these corners are taken off thanks to our bandsaw.


then onto the lathe. at first we used centers, two pins at the opposite flat sides of our cylinder to hold the axis. we spun it on low speed and started to round out the piece.


after a bit of work, it started to resemble a smooth cylinder. this is when we mounted a metal coupling on one side. this coupling is yet another way to spin the wood, though this time you have clear access to not only the long side of the piece, also the short side (face). this comes in handy later.


here is what it looks like when cutting the coasters from the cylinder.


and lastly, some sanding and a few coats of varnish complete our coasters! this is the coasters sitting face down. i cut a groove on the outside lip of the top face which isn't pictured here. drinks will not leave wet spots or ruin my tabletops ever again!