after a smooth recovery from the shelf cutting fiasco, it was time for me to pack my bags and head back home. up to this point, i had spent a total of 3 weeks working on the credenza in the shop. this is where mom picked up the project, as she is the resident finishing expert.
throughout this process i found myself being constantly corrected by my mom. i would ask her a question about what state the credenza needed to be at in order for her to start staining. she would say that she is not "staining" the credenza, she is simply finishing. this was her nice way of saying that staining is when you take cheap wood and make it look like expensive wood. she would be finishing, which is sealing and protecting my beautiful wood with no alteration of color.
here we have a picture of the shelves with the first of five coats of finish. all of these pictures are compliments of my parents, as i was not around during these steps.
we decided to go with a satin finish as the granite had been finished with a satin finish, and this would match well.
here is the base being finished.
the top and granite came back from the stone cutter's shop while i was back home. my parents sent me this picture of the top frame and the granite remnant in the back of the truck.
and shortly after, i received this picture of the granite top fitted to the mulberry top frame.
receiving these pics really got me excited.
mom and dad slated a few days to drive the credenza up in the truck when it was all done. i felt bad not being able to help them load the credenza since it's so heavy. but they got it done, and did a great job!
the cooler in the back is full of a wheat beer that my brother and dad brewed when he flew home for a visit. it was christmas in july for me and my brother.
a few shots of the shipment.
the tape has N S E W labeled on the tape so that we knew which way to orient the stone slab when installing
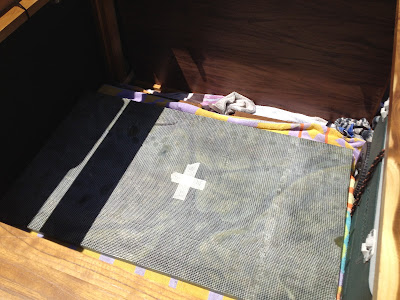
the top was secured between a few boards and saran wrapped
under the slab of stone were the doors and shelves
proof that we used the best of the best, walnut a-1.
there is still a few hours of work to be done. shelves need to be hung and the top needs to be attached to the base. these are the shelf hangers that have predrilled holes and edge banded on the visible surfaces. they are ready to be measured and secured.
my parents also brought me a little gift, a rechargeable drill for drilling and screw-driving.
here the top, shelves, and doors are stacked in the corner.
and the base, sitting approximately where it will be when all completed.
we left things at this point because my parents had been driving all day and needed a good meal and a drink. we had the next day off and allocated the daytime to assemble the credenza and get everything all set up.
link to part 10 - project complete


1 comments:
Part 10, bring it on!
Post a Comment